 Automatically
Creating a Database Table from a Record FormatAutomatically
Creating a Database Table from a Record Format
Automatically
Creating a Database Table from a Record FormatAutomatically
Creating a Database Table from a Record FormatDatabase tables can be created from record formats. These steps quickly create a database table and link objects to it:
● Connect to a database as described in Database Connection. Connecting to an empty sql database is the easiest method.
● Select the record format and create the database rows as described in the following steps.
● Connect the objects with that record format to the database table as described in the following steps. The new tables are automatically linked to the record formats.
To create a database table from a record format:
1. Select Tools > Database > Record Format Connection.
The Record Format Database Connection dialog box opens, listing the record formats available in the current file.
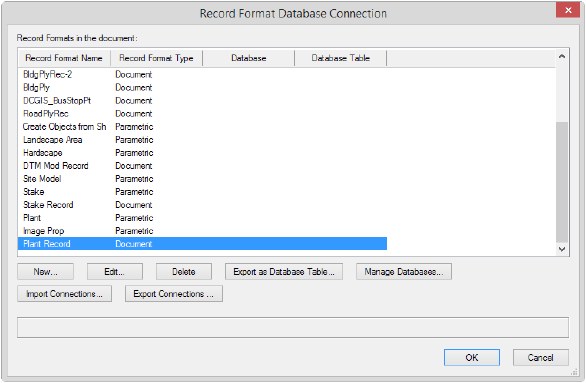
2. Select the record format, and then click Export as Database Table.
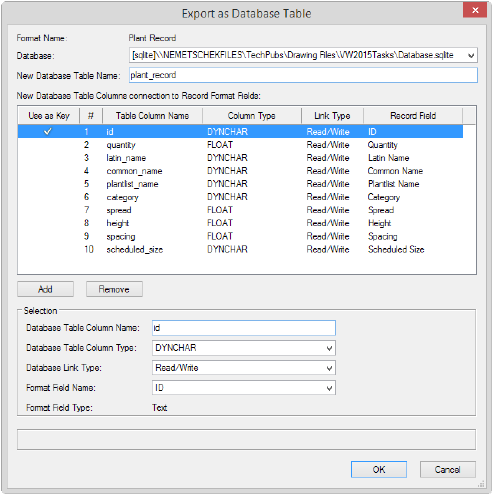
The Export as Database Table dialog box opens.
Click to show/hide the parameters.
3. Specify the parameters of the database table columns to be created. The columns will be created in the order listed; to change the order of a database table column, click and drag within the # column.
4. Click Close to return to the Export as Database Table dialog box and make any further necessary table column adjustments.
5. Click OK.
Each record field in the format becomes a column in the new database table.
6. The database rows are currently empty; the objects in the drawing need to be connected to the table to fill in the data. In this example, the plant record database table was created, so plants in the drawing need to be connected. Select all plants in the drawing.
Use the Select Similar tool to easily select all objects of a particular type that should be connected to the database.
7. Select Tools > Database > Object Connection.
Since several objects were selected, the Multiple Objects Database Connection dialog box opens.
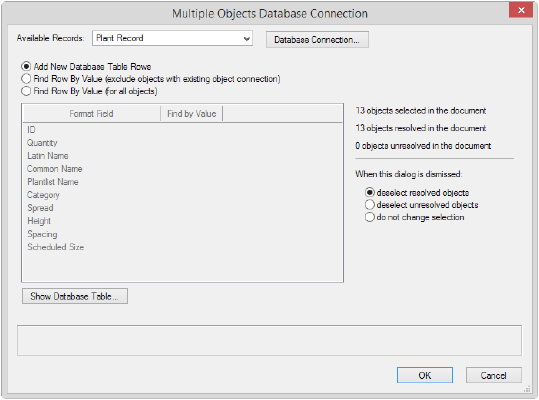
8. Select the applicable record from the Available Records list, and then select the Add New Database Table Rows option.
9. Click OK.
10. To verify that the database rows exist and have been populated with data, select Tools > Database > Manage Databases. The database rows have been created for the selected record format.
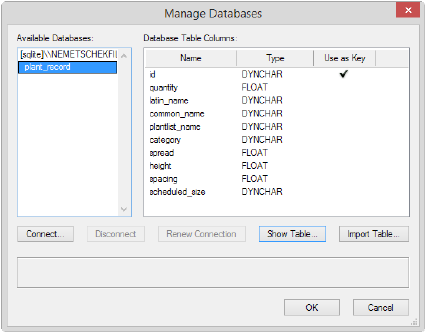
11. Click Show Table.
A dialog box opens, showing the database table for the associated record format.
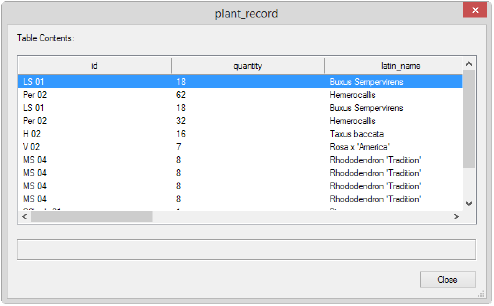
12. The objects with the record are connected to the rows of the database table. The table is filled with data from the record formats of the objects in the drawing.
~~~~~~~~~~~~~~~~~~~~~~~~~
![]()